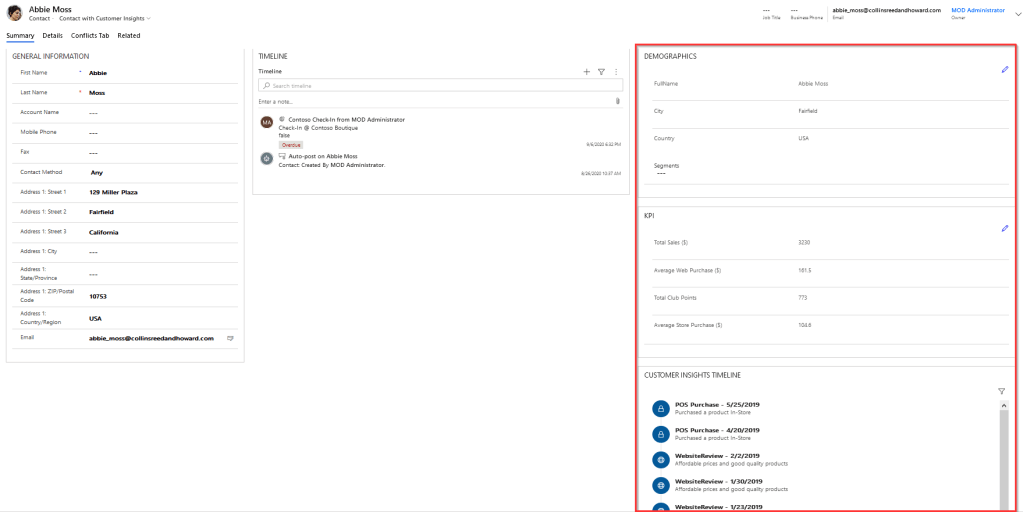
By using Customer Card Add-in we can get a 360-degree view of customers within Dynamics 365 apps (such as Sales Hub or Customer Service Hub) and view their demographics, insights, and activity timelines with the Dynamics 365.
In my previous posts, we talked about how we can ingest the purchase (eCommerce or POS) data associated with these unique customer profiles to build various measures in Customer Insights, In continuance to that, let’s see how we can extend this information to CE and visualise the Customer Insights demographics, segments, measures/KPIs, and activity timelines within Dynamics 365 Sales Hub using the Customer Card Add-in.
Prerequisites:
We would need to have the following in place:
- Dynamics 365 app, version 9.0 and later with Unified Interface enabled.
- Customer profiles from the Dynamics 365 app ingested to Customer Insights using Common Data Service (follow my previous post).
- Users of the Customer Card Add-in should be the users in Customer Insights.
- Configured search and filter capabilities in Customer Insights.
- Demographic control: Demographic fields, such as age or genders are available in the unified customer profile.
Install Customer Card Add-in:
Let’s begin by installing the ‘Customer Card Add-in’ from the AppSource. Please note that this feature is still under preview.
Step 1: Go to the Customer Card Add-in on the AppSource and click on Get it now button.

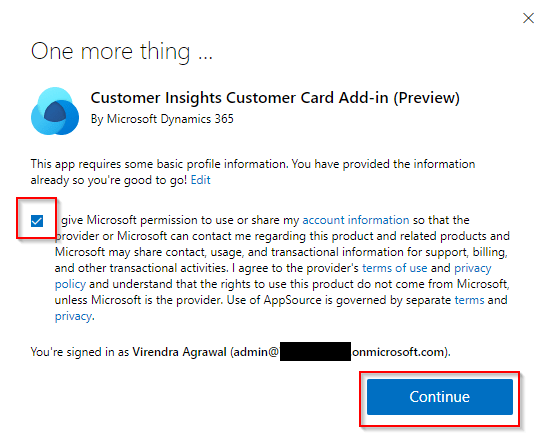
Step 2: When prompted, we will need to sign in with our admin credentials for the Dynamics 365 app to install the solution, accept the terms & conditions and click continue.
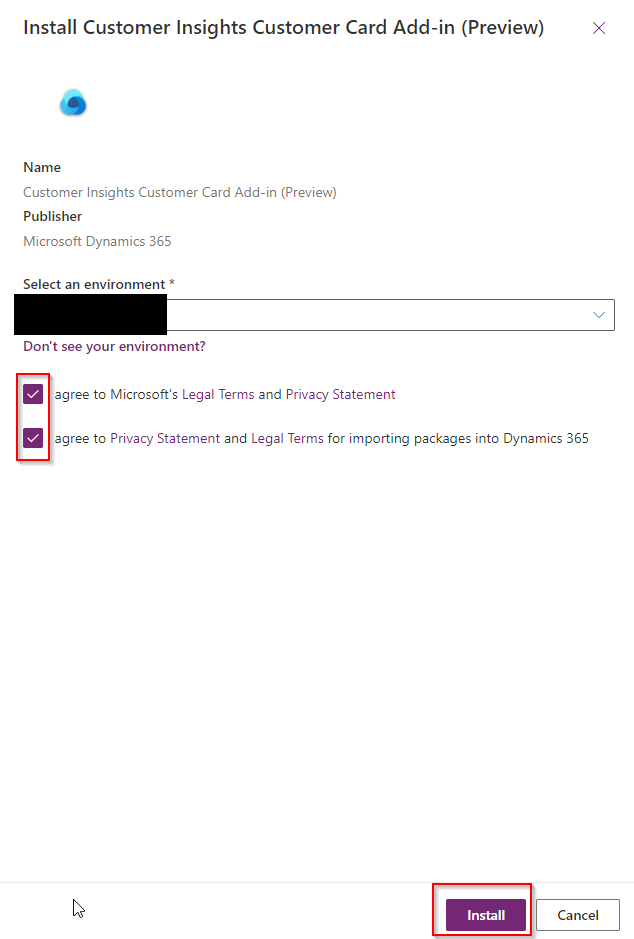
Step 2: On the Power Platform Admin Center page, select the environment, accept the terms & click on the Install button.
It can take some time for the solution to be installed to your environment, once done, we can verify the solution on https://make.powerapps.com/

Step 3: Click on the “Switch to Classic” button to navigate to configure the solution.


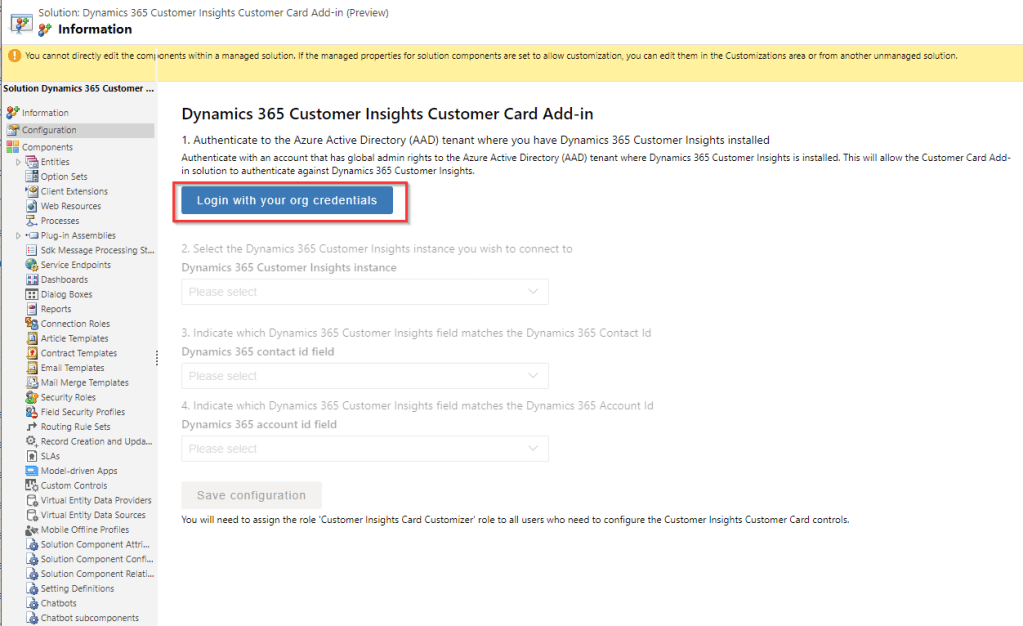
Step 4: Click on the solution and login to the organisation.
Check that the browser pop-up blocker does not block the authentication window when you select the Sign-in button.
Step 5: Select the Customer Insights instance you want to fetch data from and define which field from Customer Insights maps to a record in the Dynamics 365 app.
- To map with a contact, select the field in the Customer Insights Customer entity that matches the ID of your contact entity.
- To map with an account, select the field in the Customer Insights Customer entity that matches the ID of your account entity.
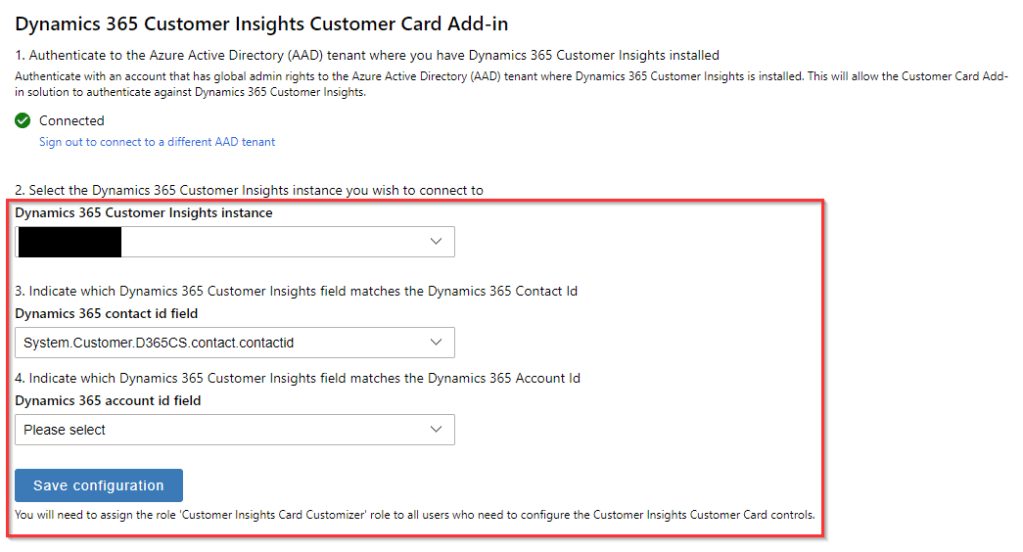
Select Save configuration to save the settings.
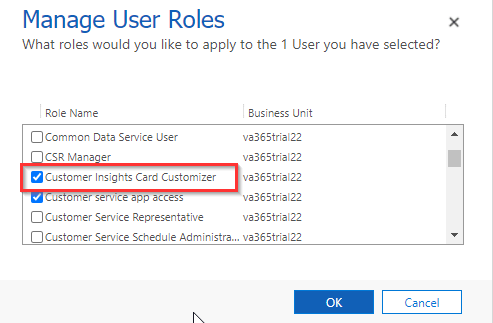
Step 6: Now, we’ll need to assign security roles in Dynamics 365 so users can customize and see the customer card. Assign the “Customer Insights Card Customizer” role to users who will customize the content shown on the card for the whole organization (this will usually be the Admin user).
Add Customer Insights Control to the Contact Entity Forms:
Now that we have installed and configured the customer insights customer card add-in solution, our next step will be to add the controls to the contact entity forms.
Step 1: To add the Customer Card controls to the Contact form, go to the Settings à Customizations in Dynamics 365 to customize the System à Browse to the Contact entity, select Forms à Select the contact form to which you want to add the Customer Card controls.

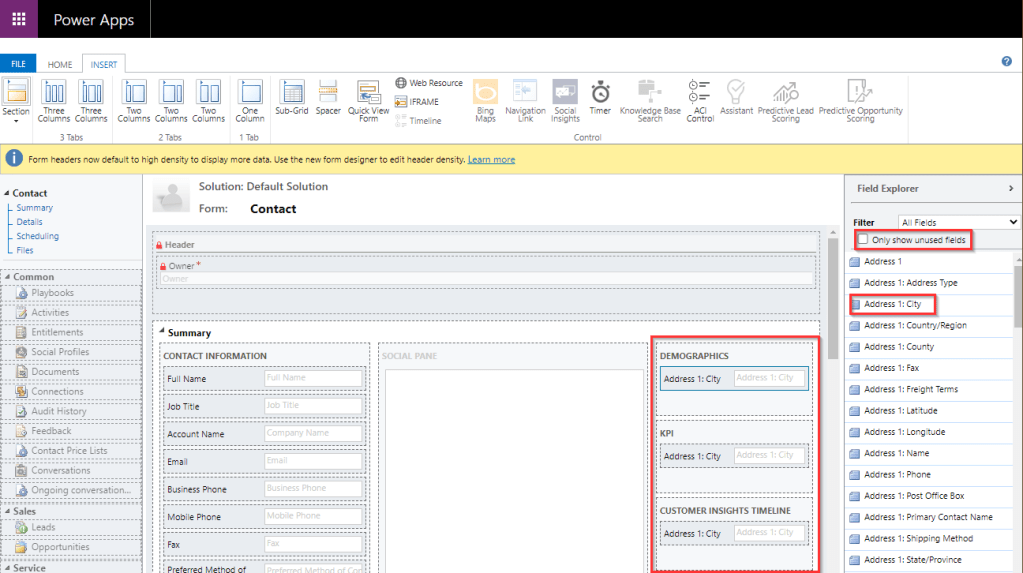
Step 2: Open the form editor, add three sections to display demographics, KPIs and Timeline information from Customer Insights.
Drag any field (this can be any text field, we’ll use “Address 1: City”) from the Field Explorer to where you want the control to appear (uncheck ‘only show unused fields’ to use the same field multiple times).
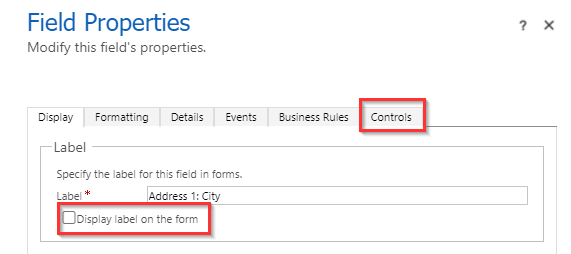
Step 3: Select the field from the ‘Demographics’ section that we just added, and click on Change Properties.
Uncheck the “Display label on the form” option and click on ‘Controls’ tab
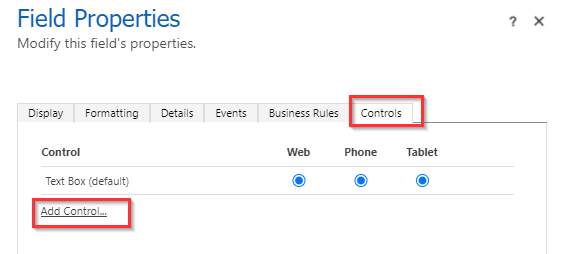
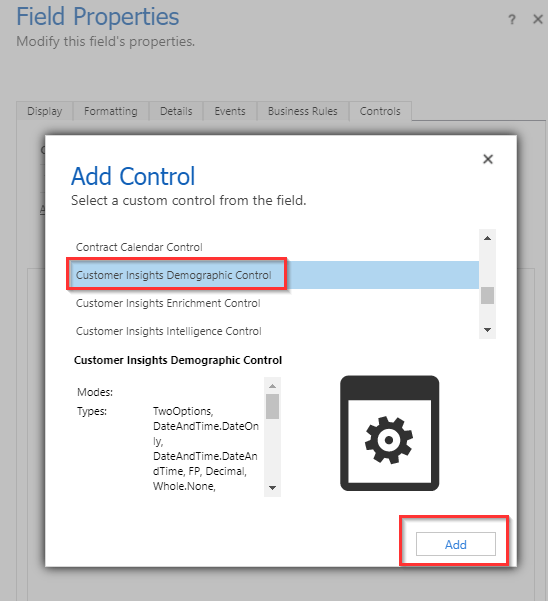
Step 4: On the Controls tab and select Add Control option.
Step 5: Look for the “Customer Insights Demographic Control” from the available custom controls and select Add.
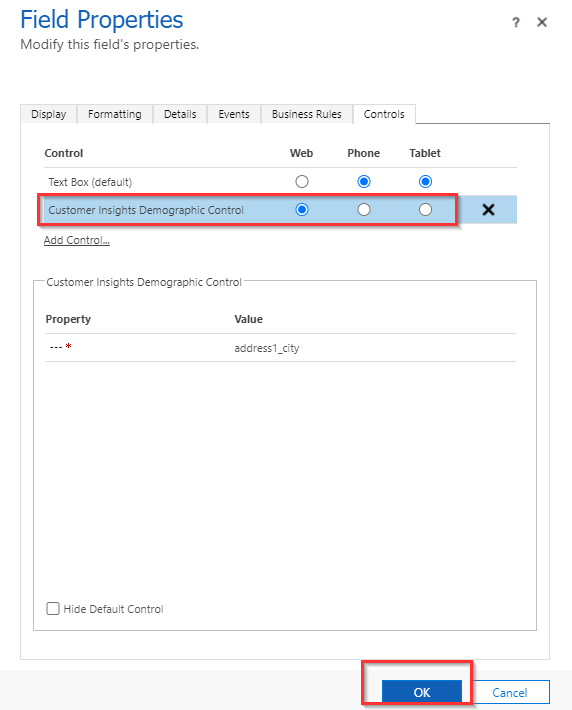
Step 6: Select the Web option for the control and click ok.
Follow Step 3 to 6 as mentioned above to add other controls, for Measures/KPIs select “Customer Insights Measures Control” and for Timelines select “Customer Insights Timeline Control”.
Finally, Click on Save and Publish to publish the updated contact form.
Go to a customer record in Sales Hub (this should be the Customer record ingested to Customer Insights using Common Data Service).
That’s it, we now have a 360-degree view of customers inside Dynamics 365 apps.
Customize what we want to show:
A user with appropriate access (Customer Insights Card Customizer security role) can modify what all information to be visible on the custom control.
To customize the information, click on the edit button on the custom control to open the details.

Search for the measures or move them up or down, click Save once done.

We can perform similar steps for other controls.
Hope you find this post helpful. Please drop your questions or suggestions in the comment box below. Thank you for reading.

What’s the best way to make the KPI data more visually appealing? Meaning…if I wanted those KPIs to display graphically, would you do that via a Canvas app, PowerBI or another method?
LikeLike
This is without any doubt the best explanation I found so far! Thank a lot!
LikeLike