In my previous post, we talked about ingesting the data from various sources with the help of different Dynamics Power Query Connectors and use this data to perform unification in Customer Insights and build a unique customer profile (Part 1 and Part 2).
In continuation of the previous posts, let’s see how we can ingest the purchase (eCommerce or POS) data associated with these unique customer profiles to build various measures in Customer Insights.
Before we begin, let’s understand what measures are and how these are useful.
Measures represent as the “Key Performance Indicators” (KPI’s) that we can define to keep a track of our Customer or Business performance. By setting these KPI’s or measures, we can set goals that we would want to achieve, monitor the actual outcomes from the unified customer profile within Customer Insights and act whenever needed to ensure we meet the goals.
Prerequisites:
Customer Insights would require unified customer profiles before you can create measures (as we did in our previous posts).
We’ll need to have the following in place:
- Dynamics 365 Customer Insight Instance;
- Unified customer profiles
- Purchase/ Transactional data
Let’s begin with the 1st step to bring the purchase/transactional data and ingest it into Customer Insights.
Ingest Online Purchase / Transactional Data:
As we already have unified the customer data, the 1st step is to ingest the sales transactional data into the Customer Insights and build the relationship between the unified customer data.
We’ll use the existing data source for online sales to ingest the transactional data.
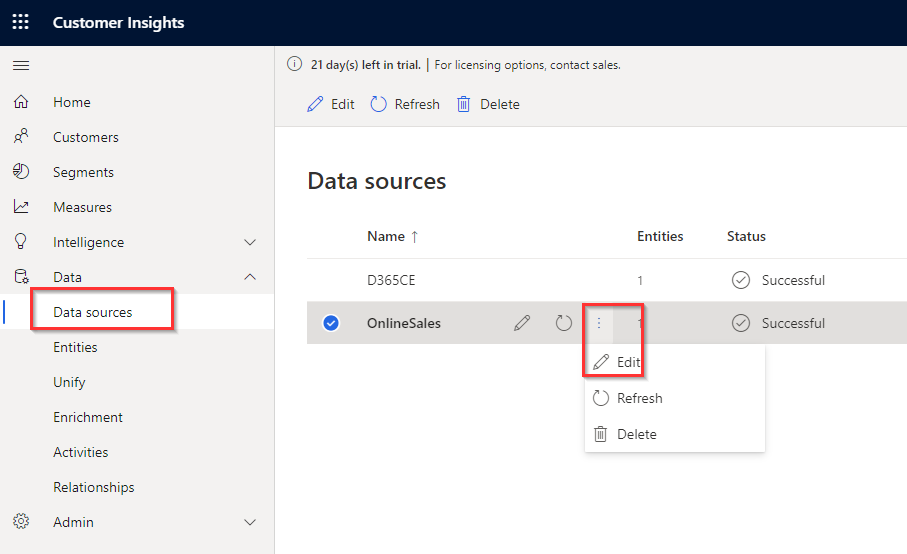
Step 1: Log in to CI instance and Navigate to Menu à Data and click on Data Sources à select the existing data source and click edit.
Step 2: Click on the ‘Get Data’ option to select a source.
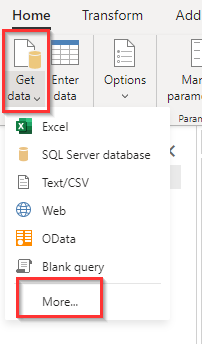
Note: you can pick a data source or click on ‘More’ to see other options. For this scenario, I’ll select ‘Text/CSV’ option.
Step 3: Provide the text/CSV file location and click next à Since I used a CSV file format, I’ll have to apply some transformation to this data such as the ‘use the first row as header’ and setting the date/time and currency fields formats.
Give a name to the table and click Save.

Step 4: Once the data is ingested, we’ll be able to see the e-commerce purchase entity under the entities area.

Create a Relationship between OnlinePurchase and Customer Entity:
Once we have the transactional data imported, we’ll need to set up the relationships in Customer Insights to configure how online purchased transactional data is related to the unified customers.
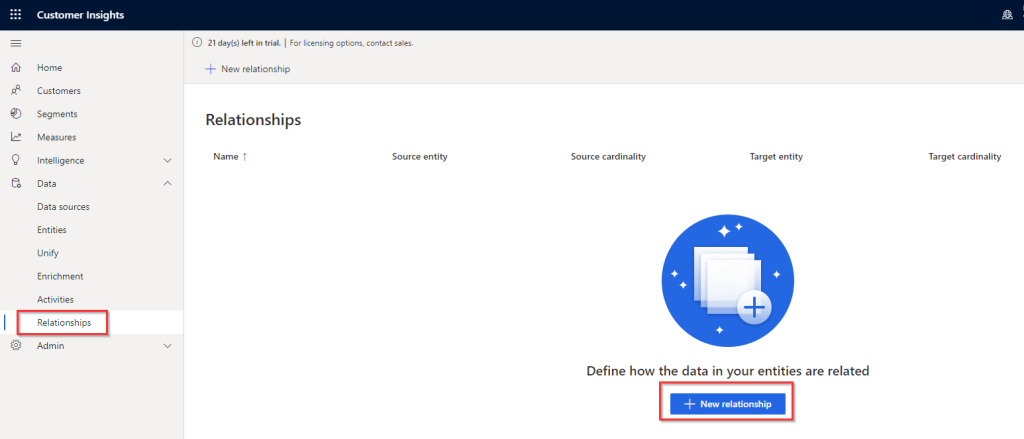
Step 1: From the menu option, click on the ‘Relationships’ to view or create a new relationship à Click on ‘New Relationships’ button.
Step 2: Give a proper name to the relationship à select the source entity (which in our case if the eCommercePurchase entity created earlier) à select the target entity (which in this case will be online contacts from the same data source).
Step 3: Set the appropriate cardinality which means the way two data sets relates to each other such as 1:1 or Many:1.
In our case, there may be multiple purchases per customer so we’ll select Many:1.
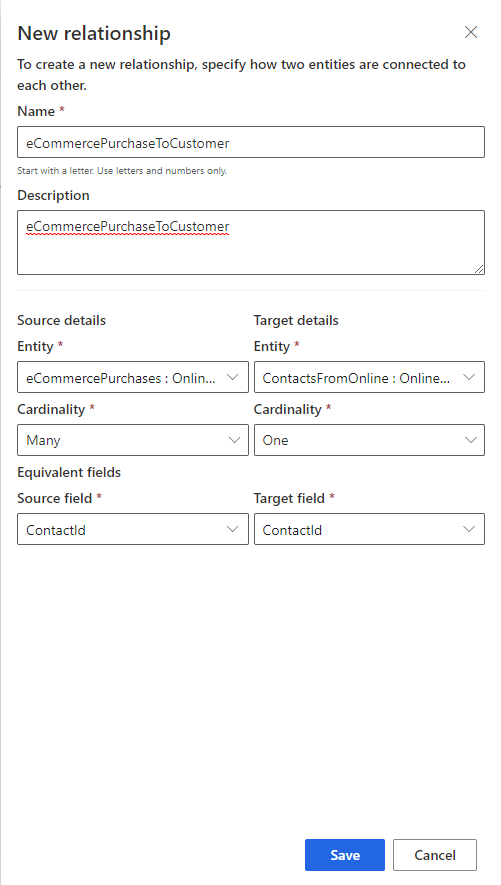
Step 4: Then select the common key between two data sets to establish the relationship, so we’ll select ‘ContactId’.
Click on Save.
Now that we have ingested the transactional data and built the relationship between transactional data and unified customer profile, we are ready to create our first insights on top of this data.
Create Measures:
Measures are KPIs that best reflect the performance and health of customers & business. Customer Insights supports three types of measures:
Customer attribute: A single field per customer that reflects a score, value, or state for the customer. Customer attributes are created as attributes in a new system-generated entity called Customer_Measure.
Customer measure: Insights on customer behaviour with a breakdown by selected dimensions. A new entity is generated for each measure, potentially with multiple records per customer.
Business measure: Tracks your business performance and health of the business. Business measures can have two different outputs: a numeric output that shows on the Home page or a new entity that you find on the Entities page.
Let’s use the same eCommerce transactional data to create three different views and aggregations.
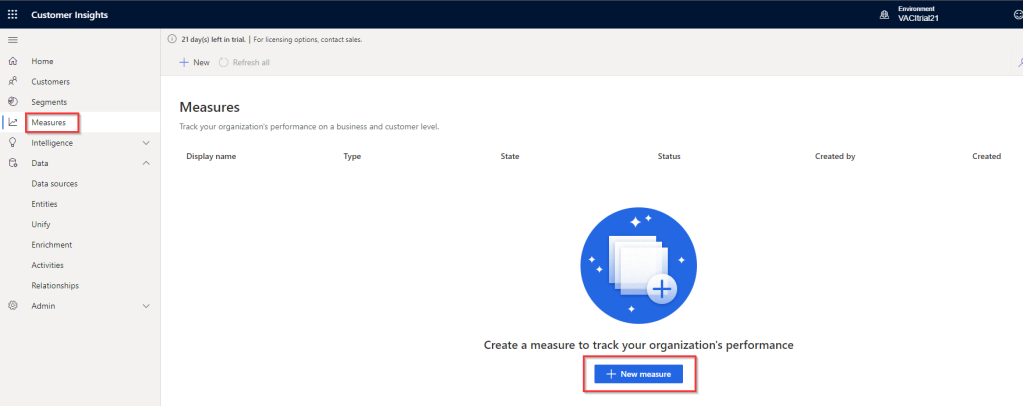
From the menu option, click on the ‘Measures’ to view or create a new measure à Click on ‘New Measures’ button.
Create Customer attribute type:
We’ll first create a ‘Customer Attribute’ type measure by creating a simple measure of the sum of total purchases per customer.
Step 1: Select the Customer attribute type measure and provide a name to this measure à Click on Next button to open the wizard.

Step 2: Since we selected the customer attribute, the first entity will default to the CI customer entity on the wizard, so select the ‘eCommercePurchase’ entity that we created above by clicking on ‘Add Entity’ option (this will show all the available entities).

Note: we can use Variables to create calculated attributes before we aggregate all records. For instance, if we have one attribute for the purchase value and another one for the tax value to sum those attributes before we aggregate.

Step 3: In this example, we’ll not use variables, so select the measure definitions options.
As our goal is to sum-up the purchase, select the function as sum, entity as eCommercePurchase, field as Total Price and provide a display name.
Click on Save to start the processing.

Create Customer Measure type:
Now let’s create a ‘Customer Measure’ type measure. The main difference between customer measure and customer attribute types is that we can add ‘dimensions’ in the definition and the output of this measure is a new entity.
We’ll create a simple measure of the sum of total purchases per customer each month.
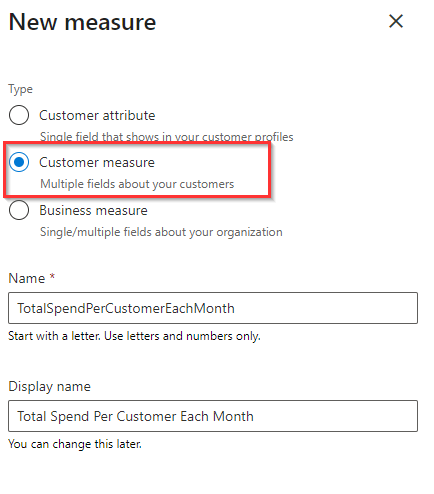
Step 1: Select the Customer Measure type and provide a name to this measure à Click on Next button to open the wizard.
Step 2: The first entity will default to the CI customer entity on the wizard, so select the ‘eCommercePurchase’ entity that we created above by clicking on ‘Add Entity’ option (this will show all the available entities).
Step 3: Select the measure definitions, as our goal is to sum-up the purchase by each month, select the function as sum, entity as eCommercePurchase, field as Total Price and provide a display name.
To add a dimension to display is based on each month, let’s add a dimension by clicking on ‘New Dimension’ option.
As we are breaking it down to based on the ‘PurchaseOn’ which is a date type field, we’ll be able to see buckets as relevant (i.e. Day, Month, year).
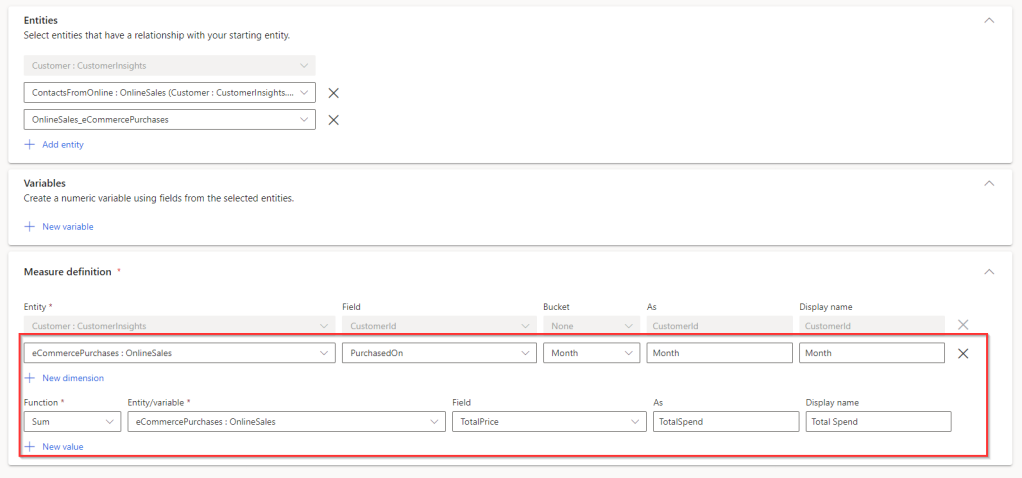
Click on Save to start the processing.
Create Business Measure type:
The third option is the business measure, unlike customer measures, this does not create the measure for each customer instead it tracks the health and performance across all customers in aggregate.
We’ll create a simple business measure of the total purchases across all customer.
Step 1: Select the Business Measure type and provide a name to this measure à Click on Next button to open the wizard.

Step 2: Unlike customer measures, the first entity will not be available by default and we’ll need to pick an entity. We can select more than one entity if we need to correlate or aggregate using different entities.
Step 3: Similar to previous measures, the measure definition is similar. The only difference is that we are not calculating it per customer but we are creating a sum of all purchases.

Click on Save to start the processing.
That’s it, our measures are now ready to use.

Note: that we can perform more actions after creating these measure such as view the records, edit the definitions or rename the measure to make it more meaningful.
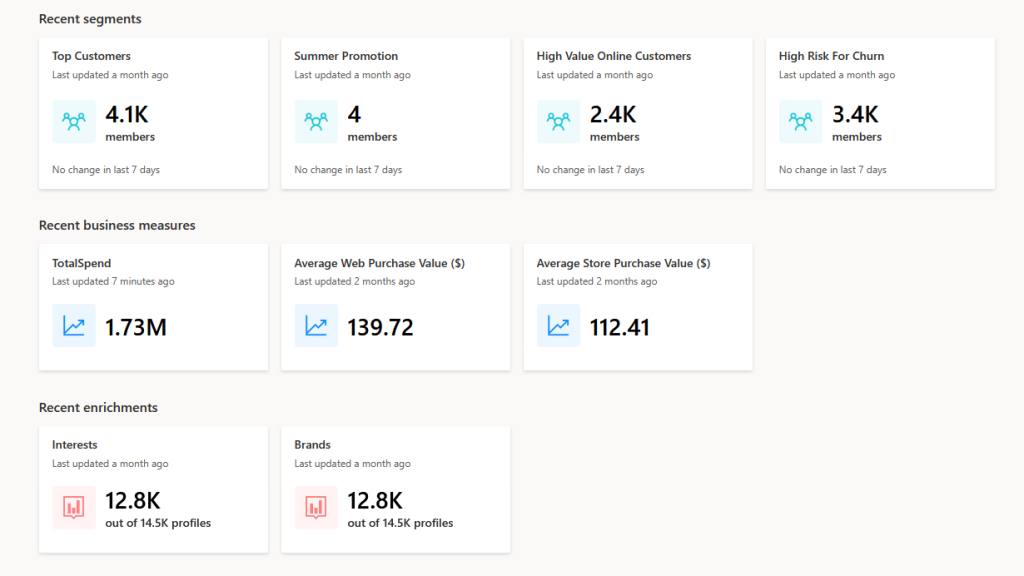
Once done, we can view the business measures on the Customer Insights Home Page:

Hope you find this post helpful. Please drop your questions or suggestions in the comment box below. Thank you for reading.

Reblogged this on Nishant Rana's Weblog.
LikeLike
[…] posted on Virendra Agrawal's Blog: In my previous post, we talked about ingesting the data from various sources with the help of […]
LikeLike
[…] purchase (eCommerce or POS) data associated with these unique customer profiles to build various measures in Customer Insights, In continuance to that, let’s see how we can extend this information to CE and visualise the […]
LikeLike
[…] Virendra Agrawal’s Blog […]
LikeLike
[…] purchase (eCommerce or POS) data associated with these unique customer profiles to build various measures in Customer Insights, In continuance to that, let’s see how we can extend this information to CE and visualise the […]
LikeLike
[…] In my previous posts, we talked about how we can ingest the purchase (eCommerce or POS) data associated with these unique customer profiles to build various measures… […]
LikeLike
Where to view customer measures, I could see only customer attribute measure at customer level in customer page & business measure at home page, But no where I can see Customer measure
LikeLike