I recently had an opportunity to work on Dynamics 365 Customer Insights for a retail client who was envisioning to consolidate their customer’s information to achieve a true customer 360-degree view.
The main objective was to remove the silos of data that represents customer purchases, payments, website visits, marketing & social interactions and customer service requests.
With it’s pre-built AI model, Customer Insights was able to help with ingesting massive amounts of data from separate systems and leverage matching strategies to build a unique profile and showcase customer’s total lifetime value, churn risk, and more.

In this series of posts, I would like to put some light on how we can use Dynamics 365 CI to ingest this customer data from multiple sources and set the matching rules to create a unified customer profile or a golden customer record.
We’ll see how we can connect Customer Insights with various data sources to ingest the data, and then perform unification by using 3Ms (Map, Match and Merge) to build a unique customer profile.
I’ll break this into two parts:
- Building Data Sources;
- Perform Data Unification
In this post, we’ll focus on building the data sources and will cover the unification in the next post (part-2).
Prerequisites:
Customer Insights would require data from at least two data sources to perform the unification. So we’ll need to have the following:
- Dynamics 365 Customer Insight Instance;
- At least two data sources (we’ll use Dynamics 365 CE for Contact entity and Online Customers from Azure Blob Storage)
Build Data Sources:
The first step is to create data connections to the sources, Customer Insights uses the Dynamics Power Query Connectors (so you may be familiar with it if you used Power BI).
First, let’s start by making the connection to the Dynamics 365 CE Contact data.
Step 1: Log in to CI instance and Navigate to Menu à Data and click on Data Sources.

Step 2: Click on “Add Data Source” button and then select ‘Import Data’ option and click Next.
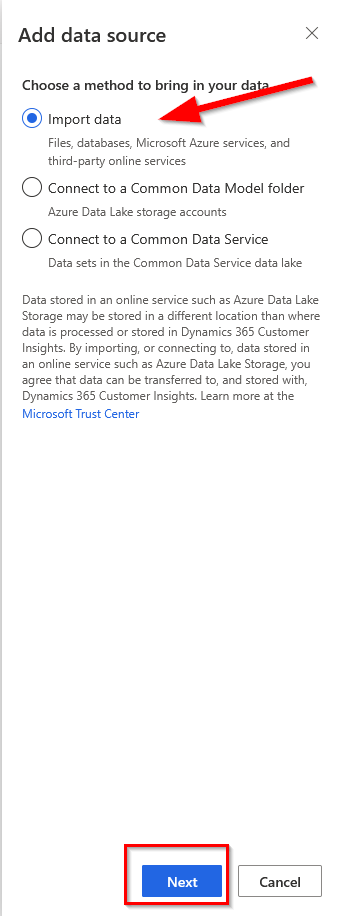
Note: that you may select other two options if you are directly connecting with Common Data service or a common data model folder from Azure Data lake. For this scenario, we’ll select Import Data to see a comprehensive list of connectors available.
Step 3: Provide a friendly name to this data source and click Next.

Step 4: Now, we see a list of connectors that can be used. As we are connecting to D365 CRM data, we’ll select ‘Common Data Service’ (CTS Connector) option from the available sources.

Step 5: Specify your Dynamics 365 CE URL and credentials required to have read access to the data source. Select Organisation account if your CI and CE instances are on the same tenant and click on Sign in.

Step 6: The common data service connector will let us explore all the entities available there. In this case, we’ll connect with ‘Contact’ entity.
So, expend the entities option and select ‘Contact’ or we can search for contact entity in the search bar.

Step 7: Now that we have selected the contact entity, we can configure or transform the way data is brought into the Customer Insights by pulling in just the data attributes that we require for the unique profile.
We can preview the data and click on the ‘Transform Data’ button.

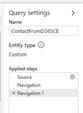
Step 8: Provide a name to this query, which will be used as the name of this entity in Customer Insights.
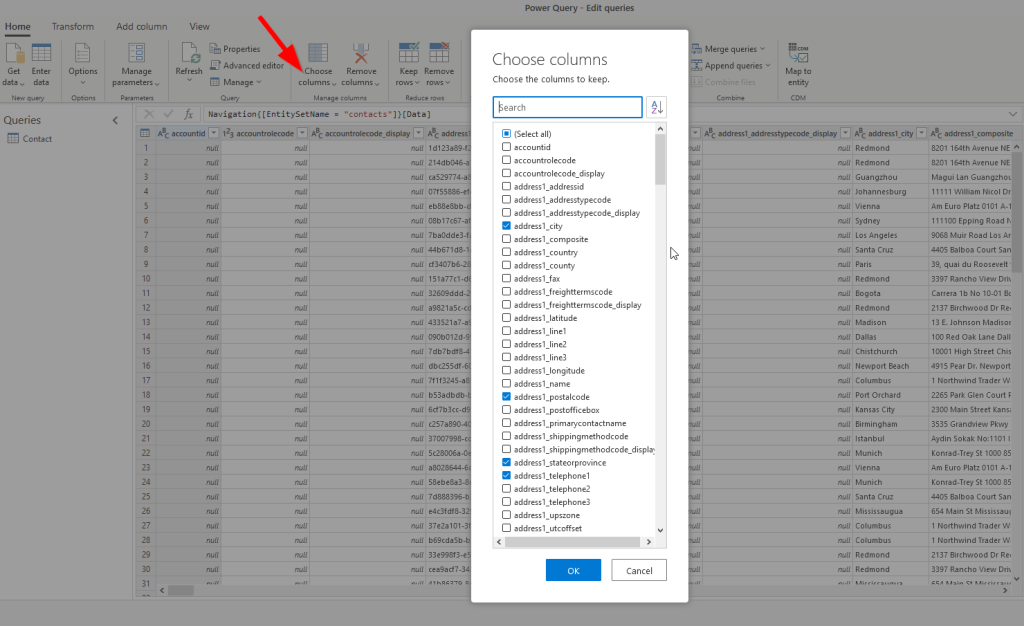
Step 9: Now, let’s pick the columns that we want to display on customer profile in CI by using the “Choose Columns” option from the menu (this is an optional step but there are so many columns that won’t be used for any analytics).
So, I’ll pick only columns that I need by searching the column name in the search box (we can change it later if we need to add or remove any columns).
Select the columns and click OK.
As we are connecting with Common Data Service, the connector will know the attribute names and data types already, so we don’t have to worry about that. Later we’ll see how we can make those changes if required.
Step 10: Click Save to complete this process. Once completed, we’ll have a successful data source and a new entity defined in CI which will have the Contact information from Dynamics 365 CE.


Now, we’ll start making connection to the 2nd data source
Let’s make a connection to another data source to bring in the online sales customers data from e-Commerce system using a CSV file.
Follow steps 1 to 3 above to create a new data source and give it a different friendly name as “online sales”.
Step 4: Now, we see a list of connectors that can be used. As we are online sales data, we’ll select the ‘Azure Blob Storage’ option from the available sources.

Step 5: Provide the details to connect to the blob storage where data is hosted and add credentials.
Click Next

Step 5: Once connected, we’ll be able to see the list of data hosted on the storage. In this case, we have the online contacts stored in a CSV file.
Select the file and click Next.

Step 6: We’ll be able to see the preview of data.As we used a CSV file to ingest the data (instead of on Common Data Service), we’ll have to tell the system about the column names and data types.
- Provide a name to the query as we did earlier for D365 Contacts.
- Check the first row and click on “Use first row as header”.
- Correct the data types wherever seems necessary by clicking the icon.

For Example, I update the DateOfBirth to “Date/Time” and CreatedOn data type to “Date/Time/Zone”.

Step 7: Click on Save when done to start ingesting the data into Customer Insights.
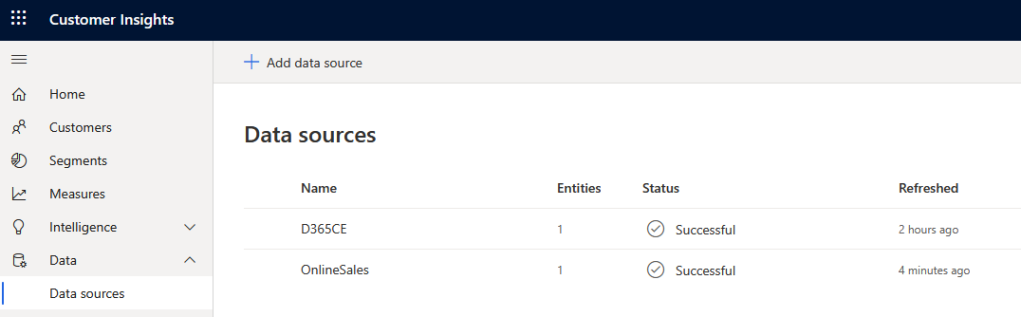
So, now we have two configured data sources available to us and two entities that represent the data coming from two different source systems.
If we need to make changes in future, we can click on the actions and click edit.

That’s it, we have the data loaded and entities created. The next step will be to unify the data using these two sources.
We’ll talk about the unification process in the second part.
Hope you find this post helpful. Please drop your questions or suggestions in the comment box below. Thank you for reading.

[…] (Part 1), we learned about how we could ingest the data from various sources with the help of different […]
LikeLiked by 1 person
Reblogged this on Nishant Rana's Weblog.
LikeLike
[…] posted on Microsoft Dynamics 365 Blogs: I recently had an opportunity to work on Dynamics 365 Customer Insights for a retail client who […]
LikeLike
[…] Microsoft Dynamics 365 Blogs […]
LikeLike
Reblogged this on Prashant Kumar Maurya.
LikeLike
[…] and use this data to perform unification in Customer Insights and build a unique customer profile (Part 1 and Part […]
LikeLike